
How to Build a Shelter in the Woods with Natural Materials
The light goes gray, the map says four miles back to the trailhead, and the temperature is dropping faster than your pace. This is the moment a shelter stops being a bushcraft hobby and becomes the thing that keeps you functional until morning. You do not need a tarp, a saw, or a sleeping bag. You need dead branches, a pile of leaves, and an hour of focused work.
What You're Actually Building
Every natural shelter does three jobs: it lifts you off the ground, blocks wind and rain, and traps a layer of still air around your body.
The debris hut is enclosed and insulated, essentially a thick pile of leaves you burrow into. It is the better choice in cold, wet, or windy conditions. The lean-to is an open-faced roof, quick to build and useful in mild weather, especially when paired with a fire that reflects heat back at you.
One rule shapes everything else: smaller is warmer. A shelter just big enough to lie down in and turn over warms up with your body heat. A roomy one stays cold no matter how much effort goes into it.
Pick the Spot Before You Pick the Branches
Site selection takes five minutes and saves an hour. Look up first. Standing dead trees, cracked limbs, and snow-loaded branches above your head are a bigger risk than the weather. Then look down and around.
- Choose ground that is flat and slightly elevated, so rain runs away from you rather than under you.
- Avoid valley bottoms, gullies, and dry creek beds. Cold air settles in low spots, and a dry bed can fill fast in a storm.
- Use a natural windbreak: a large fallen log, a rock face, or a dense stand of trees. Building against something beats building in the open.
- Face the opening away from the prevailing wind and, if you can, toward the morning sun.
- Stay within a short walk of materials. Hauling leaves 200 yards through brush burns energy you may need later.
If you have to choose between a perfect spot and a spot with deadfall and deep leaf litter, take the materials.
The Lean-To: Fast Cover in About an Hour
Build it low, and angle the roof steeply enough that water runs off instead of soaking in.
- Find a ridgepole: a straight, sturdy branch 8 to 10 feet long and about as thick as your wrist.
- Set one end into the crook of a tree or lash it to a standing trunk, roughly 3 feet off the ground. If no tree works, drive two forked sticks into the ground.
- Lean ribs against the ridgepole at a 45-degree angle, spaced a hand's width apart, with the butt ends on the ground.
- Weave thinner, flexible branches horizontally through the ribs to make a lattice.
- Shingle from the bottom up. Lay bark slabs, evergreen boughs, or large leaves like roof shingles, each layer overlapping the one below. Working bottom-up is what makes water run off rather than in.
- Pile on 18 inches of leaves and duff, then lay more boughs on top to keep the wind from carrying your insulation away.
A good lean-to is about 3 feet high at the back and long enough to lie down with a little room at your head.
The Debris Hut: Small, Thick, and Warmer Than You Think
Build the debris hut when the temperature is falling and you may be there until daylight.
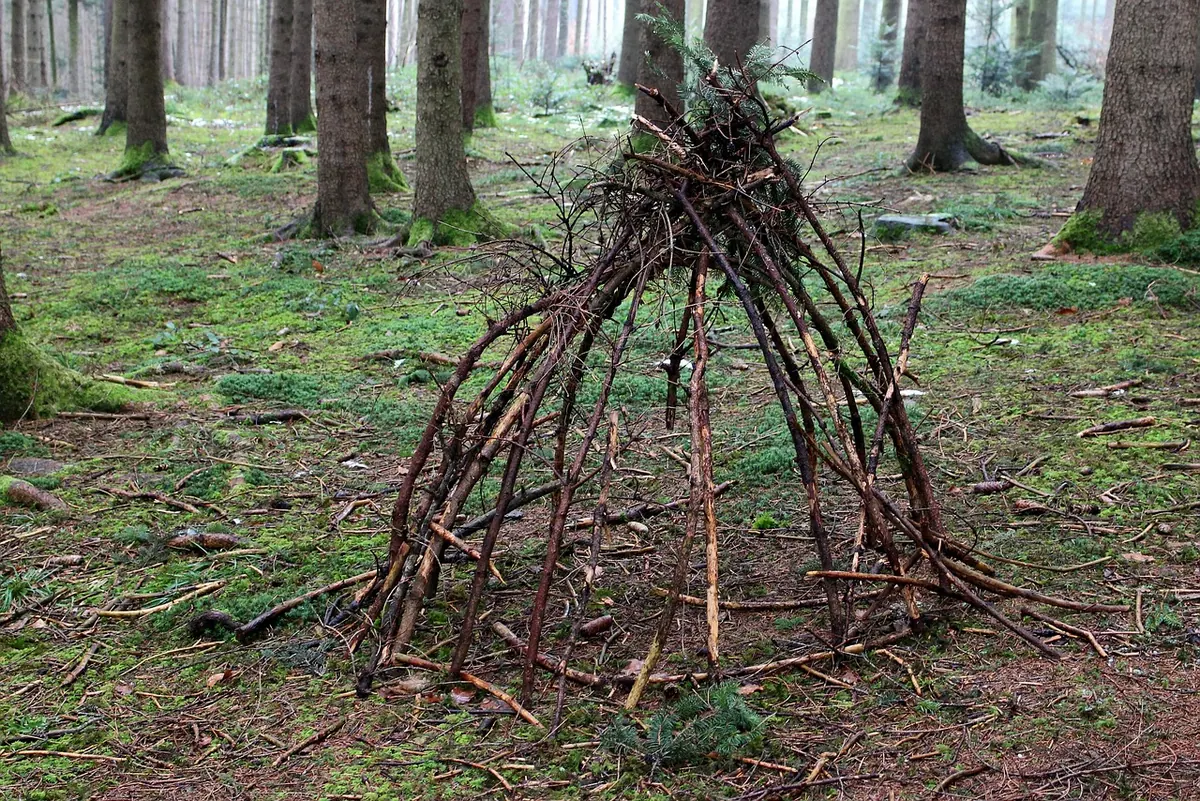
Start with a ridgepole 9 to 12 feet long. Set one end on the ground or against a stump and raise the other end 2 to 3 feet, propped in a forked stick or tree crotch. Lean ribs against both sides to make an A-frame, then add a second layer of smaller branches to fill the gaps.
Now comes the part that matters most. Cover the frame with debris 2 to 3 feet thick: leaves, needles, moss, ferns, grass, anything dry. Then fill the inside, too. The goal is to burrow into a pile rather than sit in a cave. When you crawl in, debris should touch your shoulders and hips, and you should be able to pull a plug of leaves closed behind you.
Stack debris loosely. Leaves packed flat lose the air pockets that do the insulating. If you can see daylight through the roof, keep adding.
Roughly two-thirds of your heat loss goes into the ground, so build a floor: 6 to 12 inches of dry leaves, a bed of evergreen boughs, or a log to lie against. Do not skip this.
Gathering Materials Without Wrecking the Forest
Take only dead material, and gather from a wide area rather than stripping one patch bare.
- Dead and downed branches for the frame. Green wood bends and holds moisture.
- Leaf litter for insulation. Scoop the dry layer from under trees; the top layer is often damp.
- Evergreen boughs for the outer roof, laid with the tips pointing down and outward so water follows the needles off the shelter.
- Bark slabs, large leaves, and flattened grass as shingles and gap filler.
- Duff — pine needles, twigs, fine dry material — for packing corners and plugging the entrance.
A shirt or a sheet of bark makes a decent sack for carrying leaves. Fill it, drag it, dump it, repeat. That loop is faster than armfuls.
Mistakes That Cost You Warmth
- Building too big. Extra volume is extra air you have to heat with your body.
- Under-insulating. Most first shelters have a quarter of the debris they actually need.
- Sleeping on bare ground. Insulation under you matters more than insulation over you.
- Shingling top-down, which funnels rain straight into your bedding.
- Ignoring the wind. If the opening faces it, everything you built works against you.
- Waiting until dark. Build while you can still see your materials and your footing.
Practice It Before You Need It
The best time to build a debris hut is a mild afternoon when nothing depends on it. Pick a wooded area you know, gather leaves, and see how long a usable shelter takes you. Most people find their first attempt runs twice as long as expected and uses three times as much debris.
Do that once or twice and you will know what a thick roof feels like, how much litter a floor needs, and where your supports fail. These skills are quiet and unglamorous, and they are what make a cold night survivable.
One safety note: before heading into remote country, tell someone your route and expected return, carry the essentials, and treat any shelter as a backup plan rather than a replacement for proper gear and preparation.
Photo: Antranias / Pixabay